Part 2 of ...
This is a summary of the construction of a couple of round timber structures built on my land to hold PV panels. These beautiful structures were entirely built from material taken from my land, with the exception of some concrete and fasteners.
Earlier this year I purchased 4.5 kW of Yingli PV [photovoltaic, or solar-electric] modules -- these will supply all the electrical power I need for my Pentagon House in the Hoosier National Forest.
Mon 16 Aug '10 -- Grading the Building Site
Today we harvested more rocks, moving them with the tractor, and then Bird used his tractor to grade the north side of the pond where we will be erecting the log structure.
Tues 17 Aug '10 -- Laying out the Structure
Today we cut down some more trees that would be shading the solar cells, and then staked-out where the posts for the PV log structures will go.
Below is a picture of Bird felling a hard maple -- more good firewood for the winter.
I'm glad Bird suggested me looking on my compass to verify south! I had for years called this side of the pond the north side -- but never used a compass to determine the exact direction of south -- It turned out that the "north side" of the pond was about 30 degrees off from north -- and putting them in as I had envisioned would have seriously affected the photovoltaic array's performance. We shifted the placement and angles so that the arrays would be only 15 degrees off from due south. This is close enough -- as shown in the plot below, I will lose less than 1% of my power due to this small angle.
Below is a photograph of Nashoba inspecting Bird's layout -- the intersections of the strings are the locations for the 8 posts for the structure.
One small branch broke off from one of my pear trees yesterday -- today I cut up the branch and picked up the pears -- more than 100 pounds of small pears from this one little branch! There's got to be thousands of pounds of pears on those two trees!
Wed 18 Aug '10 -- Digging the Post Holes
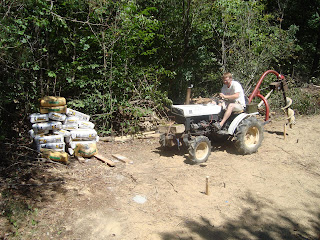
Today we picked up a couple of thousand pounds of concrete for the footings and an auger attachment for the tractor.
Again, I will say, having a tractor sure makes things easy! (e.g., moving 24 80-pound bags of concrete, and digging 3 foot holes in concrete-hard dry clay).
Unfortunately, the auger broke its universal joint not even halfway through digger the first hole!
Fortunately, I had a great collection of manual post-hole diggers, so we got a little bit of exercise! It actually didn't take that long -- perhaps a couple of hours and a lot of fruit smoothies in the 95 degree heat!
Thurs 19 Aug '10 -- Pouring concrete and setting stones
OK -- learned a nice little trick today -- all my life I've mixed concrete in wheelbarrows and then poured it into holes -- Bird today showed me the easy way -- just mix it in the hole!
Duh! Why didn't I think of that???
I didn't really want to have the normal sono-tube concrete pillars for the footings, and Bird said, "No problem, we'll just use rock from your land instead, and drill through them for the re-bar
And so that is what we did -- filled the holes with concrete and set a nice stone on top.
Went swimming with Nashoba at Crooked Creek Lake and then headed of to Blue Grass at Otis's garage.
Friday 20 Aug '10 -- Building the Stone Foundations
Bird first drilled through the foundation rock for the re-bar.
and then mortared in the re-bar.
Before stacking the other stones on top, Bird used a hammer to square the rocks up, and then "cleaned" them with a wire brush on his angle-grinder so that they would bond well to the mortar.
Be carefull trying this out at home kids -- the stiff steel fibers from the brush break off and at high speed imbed themselves into your legs -- you don't notice them until later in the pond, rinsing off, your hands push them further into your flesh, and then you go, "OW" and say other things, even worse!!!
The stone pier is finally finished using a dry paint brush to texture the mortar.
Subscribe to:
Post Comments (Atom)


No comments:
Post a Comment